
Do you want a cryptocurrency wallet that’s safer than Metamask running in your browser but don’t want to buy a hardware wallet? Do you have an old Android or iOS mobile device gathering dust and would like to give it a new purpose? You’ve come to the right tutorial because we’ll see how to use your old mobile device to convert it into a hardware wallet completely free of charge.
This method is convenient for those who want an extra step of security in safeguarding their resources. For example, Utonoma is a blockchain-based social network where content creators can earn cryptocurrencies for each like. And to like content, you need to perform a transaction with a smart contract. In this case, a content creator could use an account in Metamask for their normal use of the social network (voting on other content, commenting, etc.) and have another account, protected by an additional step of signing, to upload content and manage their channel, ensuring that no one can steal their account or the resources they earn.
For this, we will use “offline signing,” which involves having one device connected to the internet that will generate the transaction to be processed on the blockchain later. This transaction lacks cryptographic signatures. Then, we will use another device that must always be disconnected from the internet and any other type of connectivity, where our cryptographic signatures will be stored. The first device transmits the unsigned transaction to the other device so that the latter can return it signed to be sent for processing. For a hacker to access the cryptographic signatures, they would need physical access to the device containing them, unlike in a hot wallet like Metamask, where the hacker can access the device containing the signatures via the internet.
Requirements:
- A main electronic device from which we interact with our smart contracts and the blockchain. This device must have Metamask installed, either as a browser extension or as a standalone application, and must have a camera. It can be your daily-use phone or computer.
- A device with iOS (version 13.0 or higher) or Android (6.0 or higher), which must have a camera and not be “rooted” or “jailbroken”—this will be our “signing device.” On Android, you can check if the device is “rooted” using the “Root Checker” app (https://play.google.com/store/apps/details?id=com.joeykrim.rootcheck&pli=1).
Let’s begin:
- From the device you will use as a hardware wallet, access the app store and download the imToken app. This is a very reliable cryptocurrency wallet that allows connections with other apps through QR code scanning.
- After downloading, put this device completely offline by putting it in airplane mode.
- Open the imToken app and create a new wallet, then securely store the mnemonic in a backup.
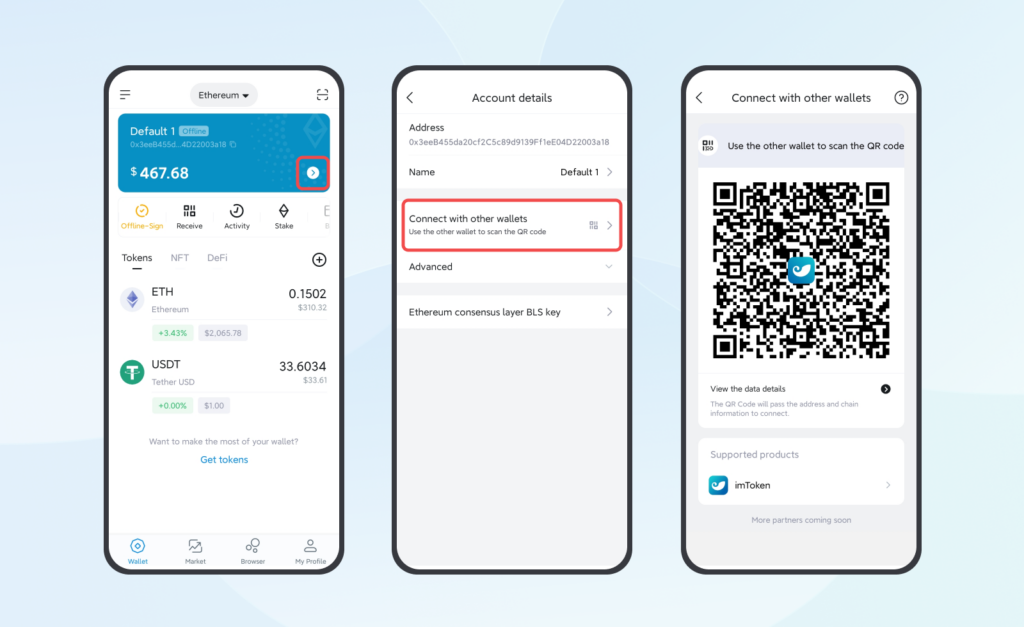
- In your wallet’s main view, tap the right arrow, then “Connect with other wallets”, a QR code will appear. This is shown in the following image:
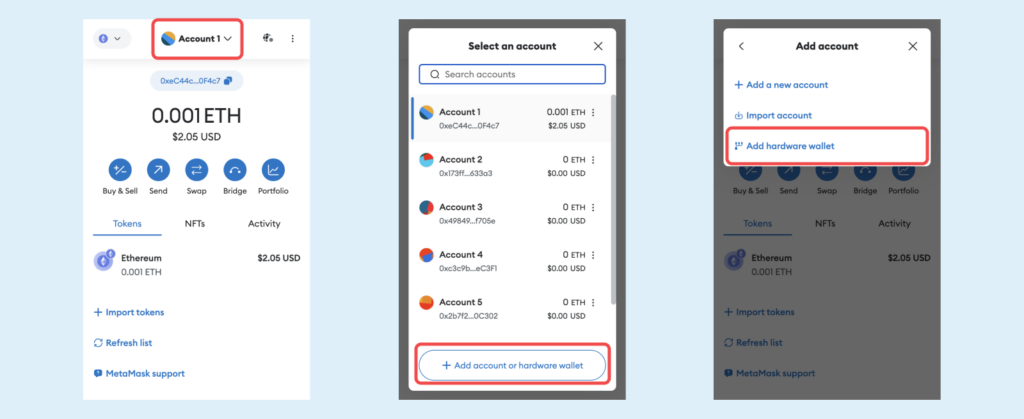
- From the other device, go to Metamask. Open the menu to select an account and, at the bottom, you will see a button that says “Add account or hardware wallet.” Tap it. Then select “Add a hardware wallet.”
- Choose the QR-based option.
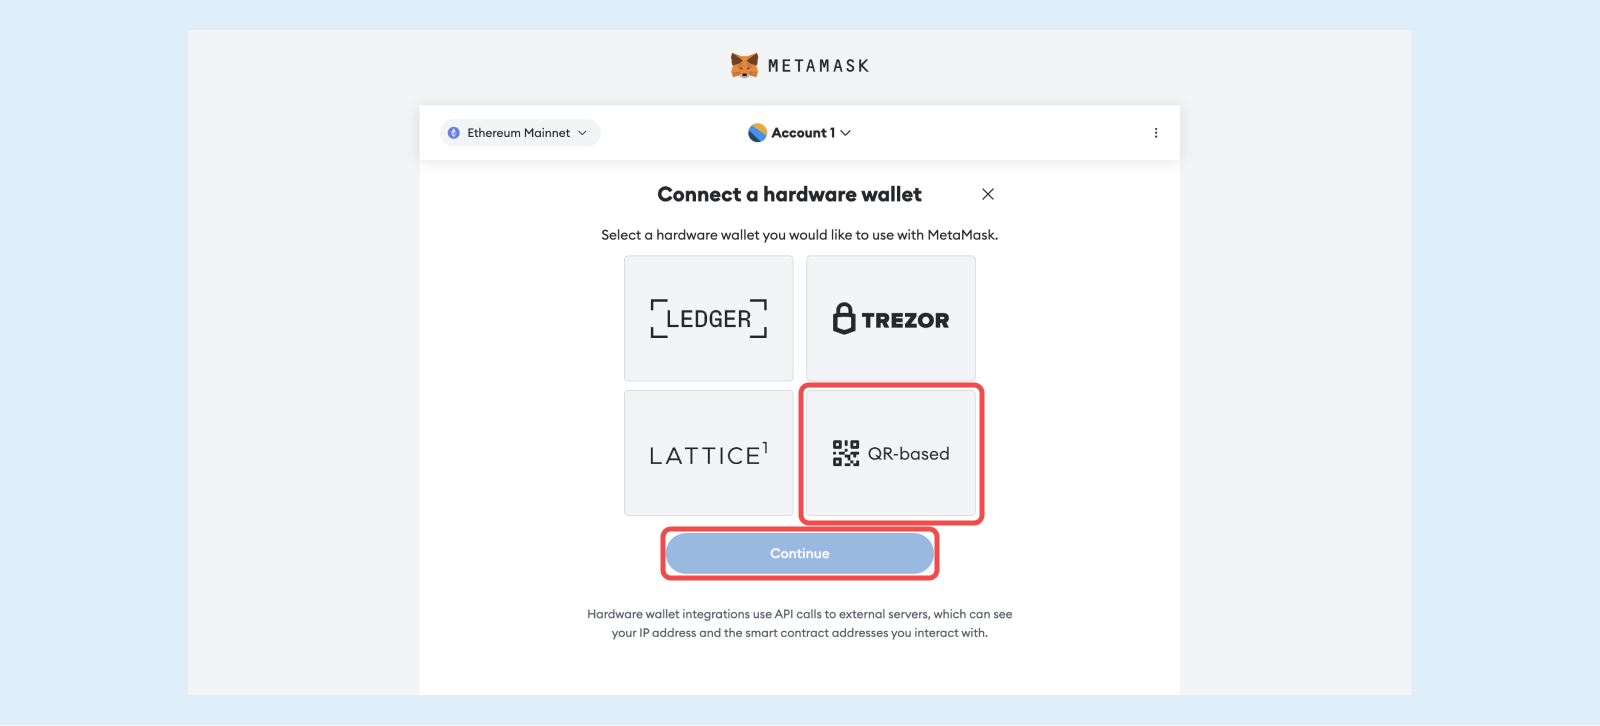
- Metamask will generate several addresses; select the address corresponding to the account you created in imToken, then click next.
Note: The device serving as the hardware wallet must never be reconnected to the internet; this guarantees greater security. It’s also advisable to set a password to access the device so that, if an attacker gains access to the device, they cannot access it or your imToken wallet.
Now that you have configured the wallet, let’s see how to perform a transaction.
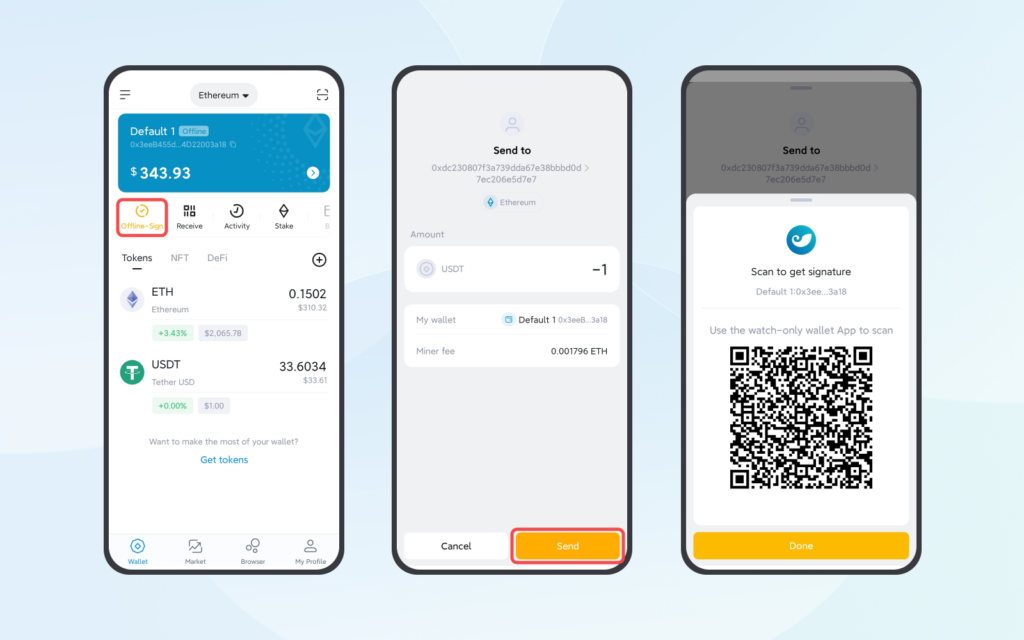
- Start the operation you want to perform in Metamask from your daily-use device, selecting the account you set up earlier. A QR code will be displayed.
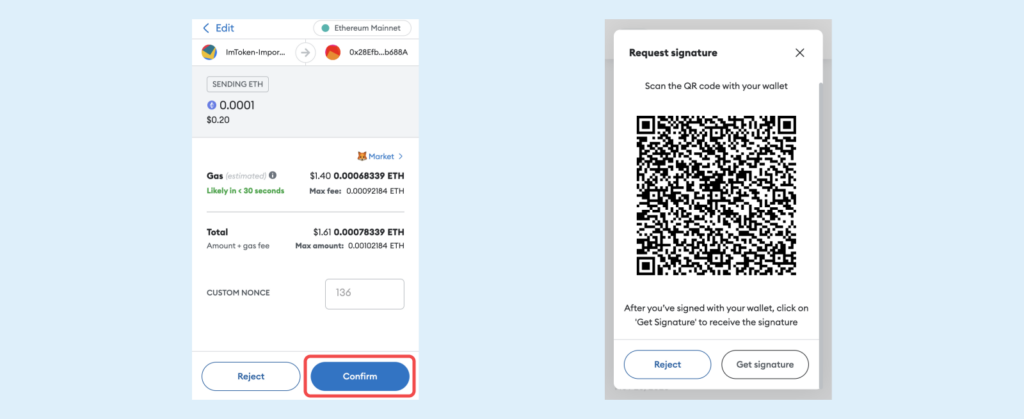
- Access your new “hardware wallet” and in imToken, select the “Offline Signing” option, scan the QR code displayed on the screen of the other device, verify that the transaction details are correct, and tap Send. A new QR code containing the signed transaction will be displayed.
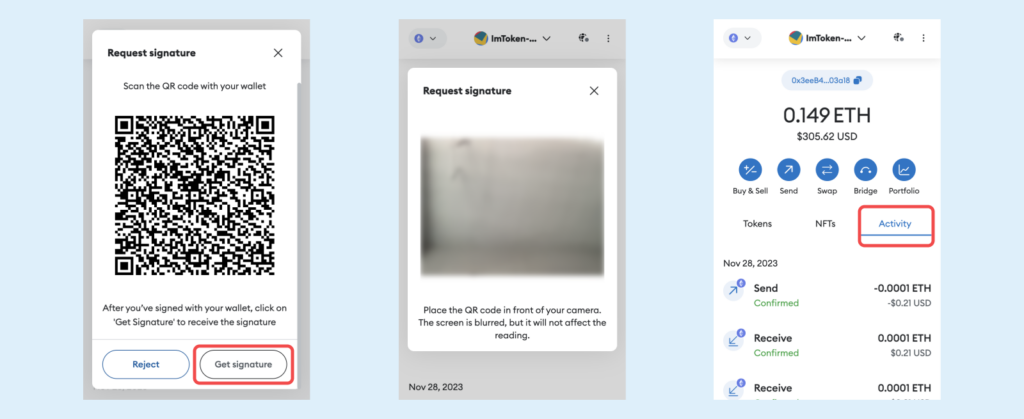
- Return to the first device and continue with the previously started transaction; in Metamask, click on the “Get signatures” option. The device’s camera will activate, and you should scan the QR code generated by imToken on the signing device’s screen.
What is the difference between this method and a hardware wallet from brands like Trezor or Ledger?
The main difference lies in the difficulty of extracting cryptographic keys if an attacker gains physical access to the device. In an Android or iOS mobile phone, password encryption is not as rigorous as in a formal hardware wallet (read more here https://medium.com/@coolbitx/hardware-wallet-secure-element-the-complete-guide-6267f262db6f). However, obtaining access to the encryption keys on a mobile device is extremely difficult, only worth attempting for very high-profile cryptocurrency users and requiring highly advanced techniques. You can watch the video titled “Hacking a Samsung Galaxy for $6,000,000 in Bitcoin!?” by user Joe Grand on YouTube to see how difficult it is (https://www.youtube.com/watch?v=icBD5PiyoyI).
Another difference is that market-sold hardware wallets usually do not operate with an internal battery; instead, they draw power from the USB port to which they are connected. In the long run, the batteries of our mobile devices tend to degrade and often may suffer physical damage. So, if you plan to store your hardware wallet created using this tutorial in a safe and access it in 10 years, you may find that the battery is damaged, which could also affect the mobile phone. In this case, it would be better to use a hardware wallet without an internal battery.
However, if you’re not a high-profile user who manages extremely valuable resources and doesn’t plan to store your hardware wallet for many years without using it but wants to take the next step in security beyond a conventional “hot wallet,” then this solution is perfect for you.
Source:
Thanks for reading